Magnetic Tool - solenoid coil tester
Powerful and precise magnetic field detection in the palm of your hand.

Excellence starts with expertise
Continue your education with Danfoss Learning, the free resource with a vast library of courses designed to expand your skills.
Installation and troubleshooting guides
Knowing why a condensing unit no longer works is important because not addressing the root cause of the problem may result in the replacement unit failing as well. This article assumes that the root cause of the condensing unit failure has been identified and corrected and the condensing unit simply needs to be replaced with a new one.
1. Disconnect power
Before starting, be sure to disconnect all power to the unit.
2. Recover refrigerant
Recover the refrigerant in the system using proper field procedures, taking note of the amount of refrigerant recovered.
3. Disconnect service wiring
Disconnect the service wiring: remove the electrical box cover, exposing the relay, and disconnect the wires.
4. Cut the line set and plan placement of new condensing unit
Before removing the existing condensing unit, look at the connections and plan ahead for where the replacement unit will be placed. In some cases, the existing unit has all its electrical connections mounted on one side, while the new unit has its electrical connections mounted on the opposite side. So, when placing the new unit, try to place it so the electrical connections are on the same side as the previous unit. The same holds true for the suction and discharge ports: be aware of where they are on the current unit and try to align the new unit so that the ports are properly located.
Cut the line set following proper field procedures.
Note: it may be possible to loosen the flare nuts and use the existing lines.
5. Remove existing condensing unit
Remove the mounting hardware and the failed condensing unit. If burnout has occurred, a flushing agent should be used following the manufacturer’s guidelines.
6. Install new condensing unit
With the failed condensing unit removed, add the new Danfoss Optyma condensing unit and mounting hardware to the system, including the electrical cover, capacitor, relay, and other hardware. First, put in the mounting grommets, then set the new compressor in place using the mounting hardware. Next add the new capacitor, following the numbered connections to the terminals on the relay in the data sheet, available in Coolselector®2.
7. Prepare copper tubing
Prepare the copper tubing. Wait until after brazing is complete before putting the electrical wires in place to prevent them from accidentally becoming damaged. Dry fit the suction and discharge lines, cleaning and deburring the ends of any copper tubing that will form the new joints.
8. Replace liquid line filter drier
While the system is open, replace the liquid line filter drier.
9. Braze connections
Braze the liquid and suction line connections while purging the system with nitrogen.
Note: do not quench the braze.
10. Test the system
Now that the brazing portion is complete, perform a standing pressure test. It is important to never exceed the system design pressures stated on the nameplate. With the system under pressure, check for leaks using either soap bubbles or an ultrasonic leak detector. Once the system passes the pressure test, release the nitrogen from the system.
Note: never use refrigerant to check for leaks; always use nitrogen.
11. Evacuate the system
Once the nitrogen has been released from the system, pull a vacuum down to 500 microns or less.
12. Connect electrical components
After a vacuum has been pulled down sufficiently on the system, connect the electrical components.
13. Charge the system
Now that the electrical components are connected, we can charge the system with refrigerant according to the manufacturer’s guidelines and reconnect power to the system.
14. Verify system operation
Ensure that the system is operating properly.
Knowing why a thermostat no longer works is important because not addressing the root cause of the problem may result in the replacement thermostat failing as well. This article assumes that the root cause of the thermostat failure has been identified and corrected and the thermostat simply needs to be replaced with a new one.
1. Disconnect power
Before starting, disconnect all power to the thermostat or the whole system if needed.
2. Remove failed thermostat
Remove the failed thermostat by disconnecting the wires and mounting screws. Then remove the sensing bulb from the bulb strap.
3. Mount new thermostat
First, pass the new wiring through the unit to the back where the new thermostat will be mounted. Pull the wire through the grommet and into the new thermostat. Next place the thermostat in the desired spot and attach with a screw.
4. Connect wiring
With the new thermostat in place, connect the electrical wiring to the terminals.
5. Set cut-in/cut-out
KPU 19 thermostats are flexible enough to either cut in or out on rising temperature. Determine which setting works best for the system and set the thermostat accordingly.
6. Install sensing bulb
Install the sensing bulb, making sure to follow the system manufacturer’s recommendations regarding sensing bulb position. If no recommendations are specified, Danfoss recommends placing the bulb across the airflow of the inlet of the evaporator using a Danfoss bulb strap.
7. Set temperature
Set the temperature. As with any thermostat, use a thermometer to check that the temperature is accurate.
8. Determine differential setting
To determine the differential setting, first calculate the difference between the desired cut-in versus the cut-out temperatures. For instance, if the cut-in is 42 °F and the cut-out is 32 °F, the temperature differential will be 9 °F. Check the table on the back of the cover to determine the differential setting, which in this case will be 4.
9. Set differential
Set the differential using a standard screwdriver, turning the differential adjustment knob to the desired value.
10. Mount adjustment dial or blank-out label
Either mount the adjustment dial, which will allow for easy temperature adjustments, or adhere the blank-out label, which will prevent temperature tampering.
11. Replace cover
Replace the cover, tightening screw to attach.
12. Verify system operation
Ensure that the system operating properly.
Knowing why a thermostat no longer works is important because not addressing the root cause of the problem may result in the replacement thermostat failing as well. This article assumes that the root cause of the thermostat failure has been identified and corrected and the thermostat simply needs to be replaced with a new one.
1. Disconnect power
Before starting, disconnect all power to the thermostat or the whole system if needed.
2. Remove failed thermostat
Remove the failed thermostat by disconnecting the wires and mounting screws. If the thermostat uses a sensing bulb, remove it now.
3. Mount the new thermostat
First, pass the wires up into the thermostat housing. Next, mount the new Danfoss KPU 60/70 thermostat.
4. Connect wiring
With the new thermostat in place, connect the electrical wiring to the terminals.
5. Set cut-in/cut-out
KPU 60/70 thermostats are flexible enough to either cut in or out on rising temperature. Determine which setting works best for the system and set the thermostat accordingly.
6. Install sensing bulb
Install the sensing bulb, making sure to follow the system manufacturer’s recommendations regarding sensing bulb position. If no recommendations are specified, Danfoss recommends placing the bulb across the airflow of the inlet of the evaporator using a Danfoss bulb strap.
The next step is to install the sensing bulb, making sure that we follow the system manufacturer’s recommendations regarding sensing blub position.
7. Set temperature
Set the temperature using either the temperature adjustment knob or a screwdriver. As with any thermostat, use a thermometer to check that the temperature is accurate.
8. Determine differential setting
To determine the differential setting, first calculate the difference between the desired cut-in versus the cut-out temperatures. For instance, if the cut-in is 42 °F and the cut-out is 32 °F, the temperature differential will be 9 °F.
9. Set differential
Set the differential using a standard screwdriver.
10. Attach adjustment knob (optional)
If desired, attach the adjustment knob for easy temperature adjustments.
11. Replace cover
Replace the cover, tightening screw to attach.
12. Verify system operation
Ensure that the system is operating properly.
Knowing why a compressor no longer works is important because not addressing the root cause of the problem may result in the replacement compressor failing as well. This article assumes that the root cause of the compressor failure has been identified and corrected and the compressor simply needs to be replaced with a new one.
1. Disconnect power
Before starting, be sure to disconnect all power to the unit.
2. Recover refrigerant
Recover the refrigerant in the system using proper field procedures, taking note of the amount of refrigerant recovered.
3. Disconnect electrical components
Disconnect the electrical components: remove the cover, slip the spade terminals off the compressor, and finish removing any existing wiring.
4. Cut line set and plan placement of new compressor
Before removing the existing compressor, look at the connections and plan ahead for where the replacement compressor will be placed. In some cases, the existing unit has all its electrical connections mounted on one side, while the new compressor has its electrical connections mounted on the opposite side. So, when placing the new compressor, try to place it so the electrical connections are on the same side as the previous compressor. The same holds true for the suction and discharge ports: be aware of where they are on the current compressor and try to align the new compressor so that the ports are properly located.
Cut the line set for both the suction and discharge sides following proper field procedures.
5. Remove existing compressor
Next, remove the mounting hardware and the failed compressor. If burnout has occurred, a flushing agent should be used following the manufacturer’s guidelines.
6. Install new compressor
With the failed compressor removed, add the new Danfoss light commercial compressor and mounting hardware to the system, including the electrical cover, capacitor, relay, and other hardware. First, put in the mounting grommets, then set the new compressor in place using the mounting hardware. Next add the new capacitor, following the numbered connections to the terminals on the relay in the data sheet, available at odsg.danfoss.com.
The relay should match up and join with the three connectors on the side of the compressor, though in some cases, some additional spade connectors may be needed for the wiring to match up with the new hardware.
7. Prepare copper tubing
Prepare the copper tubing. Wait until after brazing is complete before putting the electrical wires in place to prevent them from accidentally becoming damaged. Dry fit the suction and discharge lines, cleaning and deburring the ends of any copper tubing that will form the new joints.
8. Braze connections
Braze the compressor connections while purging the system with nitrogen.
Note: do not quench the braze.
9. Replace liquid line filter drier
While the system is open, replace the liquid line filter drier.
10. Test system
Now that the brazing portion is complete, perform a standing pressure test. It is important to never exceed the system design pressures stated on the nameplate. With the system under pressure, check for leaks using either soap bubbles or an ultrasonic leak detector. Once the system passes the pressure test, release the nitrogen from the system.
Note: never use refrigerant to check for leaks; always use nitrogen.
11. Evacuate system
Once the nitrogen has been released from the system, pull a vacuum down to 500 microns or lower.
12. Connect electrical components
After a vacuum has been pulled down sufficiently on the system, connect the electrical components.
13. Charge system
Now that the electrical components are connected, charge the system with refrigerant according to the manufacturer’s guidelines and reconnect the power to the system.
14. Verify system operation
Ensure that the system is properly operating.
Knowing why a pressure switch no longer works is important because not addressing the root cause of the problem may result in the replacement thermostat failing as well. This article assumes that the root cause of the switch failure has been identified and corrected and the switch simply needs to be replaced with a new one.
1. Disconnect power
Before starting, disconnect all power to the pressure switch or the whole system if needed.
2. Recover refrigerant
Recover the refrigerant in the system using proper field procedures.
3. Disconnect electrical wiring from the pressure switch terminals
Disconnect the electrical wiring from the pressure switch: remove the cover, unscrew the terminals, and remove the wires.
4. Remove old switch
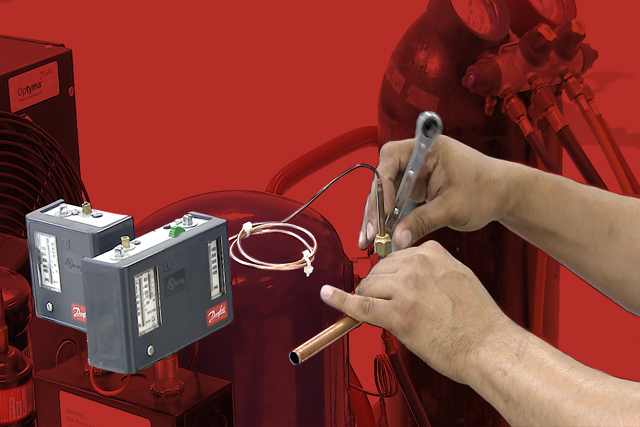
Remove the pressure connection(s). When removing these connections, use two wrenches to avoid torqueing the copper pipe. Unscrew the flare nut, moving any attached capillary tube(s) up and out of the way. With the pressure and electrical connections detached, remove the old switch.
5. Verify low pressure and high pressure sides for dual pressure switches
Take note of the location of each pressure scale when installing a dual pressure switch, as those made by other manufacturers may differ.
6. Install the new Danfoss KPU pressure switch
Install the new Danfoss KPU pressure switch. If installing a dual pressure switch, the low-pressure side is on the left and the high-pressure side is on the right.
7. Set convertible reset
The Danfoss KPU pressure switch has a convertible reset; it can change from manual to automatic by moving the cam on top. Rotate the cam clockwise to change the setting.
8. Install new pressure switch
If present, carefully bend any attached capillary tube(s) out of the way and mount the pressure switch, either by using the included mounting screws or by using a conduit.
9. Attach electrical wiring
Connect the electrical wires to the appropriate terminal—the number of terminals varies depending on the model. The grounding screw is on the front plate.
10. Connect capillary tubing
Connect the capillary tubing, tighten the fittings with two wrenches to avoid torqueing the copper pipe. When positioning the capillary tubes, avoid placing them where future work may need to be performed and leave enough slack to allow for vibrations without touching other components.
11. Install a new filter drier
Any time a refrigeration system is opened, the filter drier should be replaced.
12. Test the system
Conduct a standing nitrogen pressure test. The standing pressure test should not exceed the maximum system pressure as recommended by the equipment manufacturer. If the system experiences no drop-in pressure, then it is free of leaks.
13. Charge system
Pull a vacuum to 500 microns or below and then properly charge the system according to best field practices.
14. Reconnect power to the unit
Reconnect electric power to the pressure switch.
15. Set cut in/cut out and differential
Set the cut in and/or cut out and differential with the range adjusting screw(s) and the differential adjusting screw, respectively. If installing a dual pressure switch, the high side differential is fixed at 60 psi.
Use either the same settings as the old switch or use the system manufacturer’s recommended settings
16. Use gauges to verify accurate system performance
For the accuracy of the switch, use manifold gauges to verify settings and proper system operation.
Disclaimer: All actual service work must be performed by a qualified licensed refrigeration service technician equipped with the appropriate tools and test instruments.
1. Monitor adjustments using pressure gauges
Be sure to attach pressure gauges before making any pressure adjustments to the system and monitor changes after each adjustment is made.
2. Loosen locking screws
Each adjustment is guarded by a locking screw, which must be loosened before adjustments can be made.
3. Adjust low side setpoint
To make adjustments to your low side, use a screwdriver to turn the spindle clockwise to lower the value and counterclockwise to raise the value.
4. Adjust the low side differential
To make adjustments to your differential, turn the spindle clockwise to raise the value and counterclockwise to lower the value.
5. Adjust high side setpoint
To make adjustments to the high side setpoint, turn the spindle clockwise to raise the value.
6. Tighten the locking screws
After your adjustments are complete, retighten each locking screw to prevent unwanted tampering.
7. Adjust the reset function
Using a screwdriver to make adjustments to the reset function of the switch, insert the screwdriver into the eye of the lobe.
NOTE: The screwdriver must be placed in the eye of the lobe as the brass screw is not designed to be adjusted directly and may break under direct pressure.
The switch comes packaged in position 1, which provides manual reset for both the low and high pressure sides of the switch.
Moving the lobe to position 2 provides an automatic reset on the low-pressure side while retaining the manual reset on the high pressure side.
Position 3 provides an automatic reset on both the low and high pressure sides.
Position 4 provides a manual reset on the low-pressure side and an automatic reset on the high pressure side.
With this final adjustment made, your KPU pressure switch is now ready for use.
For KPU pressure switch installation, see the article on the subject, above. This article may be used in conjunction with our video on the subject.
Refrigeration fitters notes
The Fitters Notes provide relevant information about Danfoss refrigeration controls (mechanical) and Danfoss compressors, a good fault location overview, important installation tips and also extra room for own notes. To troubleshoot a specific product in your installation please find a list of relevant troubleshooting documents available for download in the list below the refrigeration overview.
Aftermarket product line
-
if (isSmallPicture) {


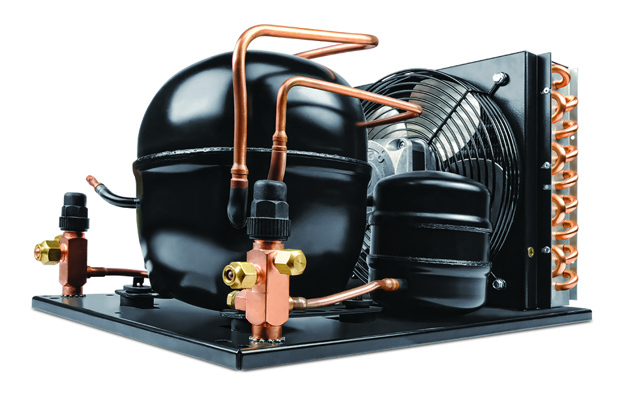
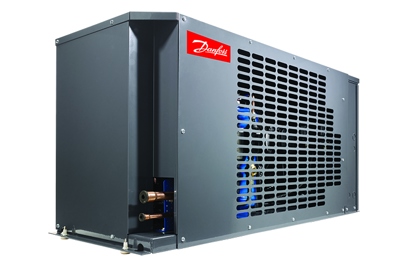
 Optyma™ indoor condensing unit
Built to reduce installation and maintenance costs, these smart designs and components save valuable time and money while making production even more efficient with the minimum impact on the neighborhood.
-
if (isSmallPicture) {


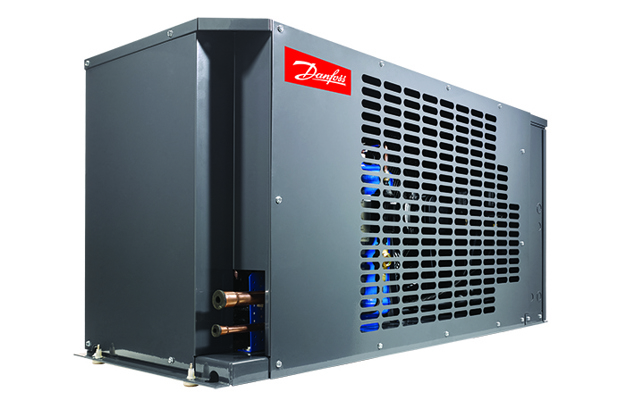
 Optyma™ Slim outdoor condensing unit
Built to reduce installation and maintenance costs, these smart designs and components save valuable time and money while making production even more efficient with the minimum impact on the neighborhood.
-
if (isSmallPicture) {


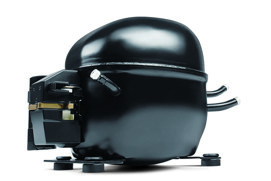
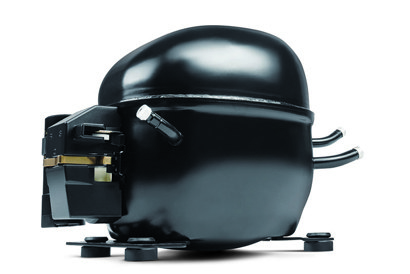
 Light commercial compressors
Light commercial reciprocating compressors for low, medium, and high temperatures.
-
if (isSmallPicture) {


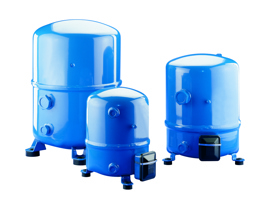
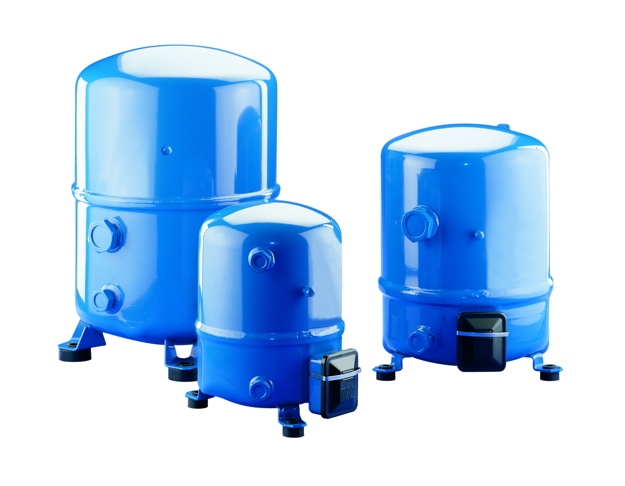
 MTZ/MT/NTZ reciprocating compressors
Maneurop® MT, MTZ, and NTZ hermetic reciprocating compressors by Danfoss are designed for low-, medium-, and high-temperature applications. Compressors are available for a wide range of applications, refrigerants, and operating conditions and future-proven, built-in performance enhancers and safety measures.
-
if (isSmallPicture) {


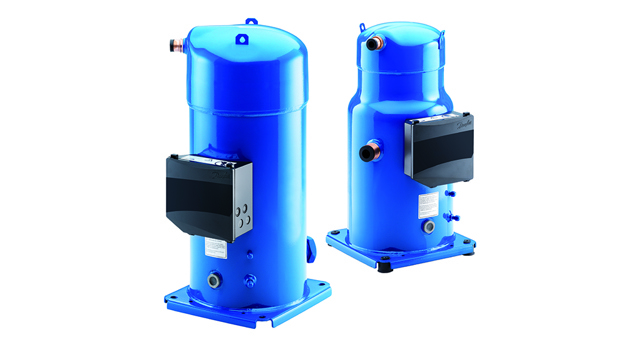
 DSH-series scroll compressors with IDV
Optimal performance under part-load conditions
FAQ
Frequently asked questions
Can I change the internals on an EVR## without removing the valve?
Yes, you can change the internals without removing the valve. However, the valve will allow refrigerant a clear path to the atmosphere. The refrigerant must be recovered before starting this process.
Can MTZ compressors replace MT compressors?
MTZ compressors, as shipped, are not appropriate replacements for MT compressors. MT compressors are rated for R22 and come with mineral oil. MTZ compressors are rated for R-134a, R-404a, R-407A/C/F, and come with POE oil.
Can SZ compressors replace SM compressors?
SM compressors, as shipped, are rated for R22 and come with mineral oil. SZ compressors are rated for R-134a, R-404a / R-507A, R-407C, and come with POE oil. Therefore, SZ compressors are not appropriate replacements for SM compressors.
Can the SZ model series be used with R22?
No, the SZ model compressor is not rated for R22 as it is shipped from the factory.
Do you have any programs or mobile apps to assist with part selection?
Yes, Coolselector2® is Danfoss’ product selection software for all your selection and calculation needs, available for both online and offline use.
How can I purchase a replacement ERC controller?
ERC213 electronic controllers are available at your local Danfoss wholesaler, which can be found here.
For all other ERC electronic controllers, please contact your OEM because OEMs enter all the parameters and set-up for each piece of equipment.
How do I adjust the superheat on a TUA and/or TUAE thermostatic expansion valve?
To adjust the superheat on a TUA/TUAE thermostatic expansion valve, remove the cap with a 5/32” hex key. Superheat adjustments are made a ¼ turn at a time (¼ turn ≈ 1 °F): Turning clockwise increases superheat, turning counter-clockwise decreases superheat. Once you have made your adjustments, reinstall the cap.
This video on our YouTube channel walks you through the process of safely and accurately adjusting the superheat.
How do I find the part number on a KP/U pressure or temperature control?
To find the part number of a KP/U pressure or temperature control, look down on the top of the control where the pressure adjustments are made. The part number will be stamped into the metal. The part number typically begins with “060” followed by either four or six additional numbers. You will not need to remove the plastic front cover in order to find the part number.
How do I identify a Danfoss pressure or temperature sensor so I can order a replacement?
For pressure and temperature sensors, the part number can be found on the data label tag and will consist of three numbers, one letter, then four additional numbers. If this replacement is for a new application, part numbers can be found at the Danfoss product store.
How do I know what orifice is installed in a TUA/E type thermostatic expansion valve?
To identify the orifice, check the bottom of the TUA/E valve and you will see a nut. The orifice size, as well as the Danfoss part number, will appear on the head of the nut, as shown below.

How do I remove a solenoid coil?
First, de-energize the solenoid coil and remove the nut on top, if one is present. Using a screwdriver, pry up the “u” clip, if present. Then, remove the coil by lifting straight up on the coil holding the valve in place.
I am looking for a Danfoss option to replace another manufacturers’ compressor. Does Danfoss have a cross-reference tool I can use?
I am trying to replace a Danfoss refrigeration solenoid valve but cannot find a part number. What information is needed?
If this is a Danfoss EVR solenoid valve you are looking to replace, and there is no data label tag, remove the solenoid coil from the actuator stem. The part number will be three numbers, one letter, and four more numbers stamped on the side of the actuator stem.
If the part number cannot be found, please contact Danfoss at 1(888)326-3677 with the refrigerant used, where the valve is installed in the system, NO/NC, heat load capacity and design conditions to size a new solenoid valve and our technical support team will assist you.
I have an ACB cartridge pressure switch. Where can I find a single replacement?
To source the proper replacement, you will need to contact the OEM for the piece of packaged equipment in which the ACB cartridge pressure switch is installed on.
Is there a replacement for 077F controllers?
The 077F is an ETC controller, and there is currently no aftermarket option. Please contact your OEM for the piece of equipment the ETC controller is installed on.
Where can I find a compressor technical data sheet or dimensional drawing?
Data sheets and dimensional drawings for Danfoss compressors are available on our website. Click the links below to access this information for a specific compressor.
Light commercial compressors
MTZ/MT/NTZ reciprocating compressors
S-series compressors
DSH-series scroll compressors with IDV
Where can I find a Danfoss authorized wholesaler to purchase parts?
To find a Danfoss authorized wholesaler to purchase replacement parts, visit our distributor/wholesaler directory here or visit www.marsdelivers.com.
Where can I find information on Danfoss condensing units or spare parts?
Whether you want information about an indoor or an outdoor condensing unit, Danfoss’ technical information and spare parts can be found here on our website.
Where can I find spare parts, rotolock valves and crankcase heaters for Danfoss Compressors?
For spare parts, rotolock valves and crankcase heaters for Danfoss compressors, please review the Danfoss spare parts and accessories catalog to meet your individual needs.
Where can I find the products which are set up for sale in the North American market?
To find aftermarket products for sale in North America, scroll down on this page for the complete portfolio. The complete line of Danfoss products is also available at store.danfoss.com.
Contact Tech Support
Please provide as many details as possible regarding your Danfoss product questions, so we can direct you to the most suitable application expert.

